Fitting Process
The ocular prosthetic fabrication process shown below is called the “Modified Impression Method” of fitting. There are several variations to this process. Every client’s situation is different therefore; your ocularist may utilize one or more varying techniques to achieve our ultimate goal: a superior life-like cosmetic appearance, ensuring maximum movement and comfort.
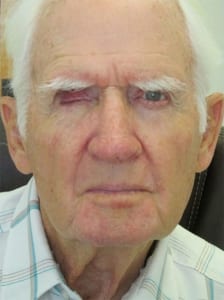
Fig.1 - The initial step in manufacturing a custom ocular prosthesis is to carefully examine each client’s unique situation. A plan is then formulated to ensure great results.
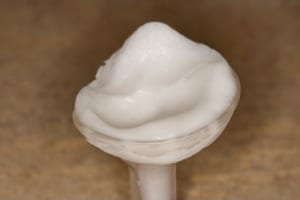
Fig.2 - An alginate impression is made of the eye socket. This impression fills the cavity and matches the contours behind the eyelids where the new prosthesis will fit.
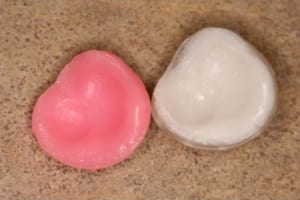
Fig.3 - A duplicate wax shape is made from the alginate impression matching the patient’s socket
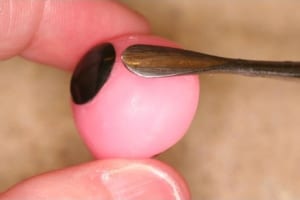
Fig.4 - The wax pattern is modified and smoothed. A curved plastic black disk is used to simulate correct iris size and position.

Fig.5 - The preliminary wax model is inserted under the eyelids. This shape is modified until the correct contours of the eyelids and iris positioning are achieved in relation to the client’s companion eye. Special attention is also paid to maximize movement and comfort.

Fig.6 - A stone mold of the wax pattern is made in a two part stainless steel flask. The clear plastic stem placed on the wax pattern ensures proper iris positioning during the fabrication process.
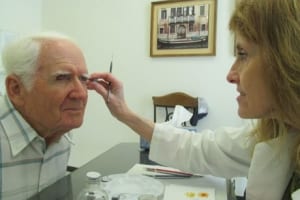
Fig.7 - The client’s iris color is hand painted on a flat black acrylic disk. Using the client’s companion eye as the model, the colors are applied by mixing the highest quality oil pigments with acrylic syrup.
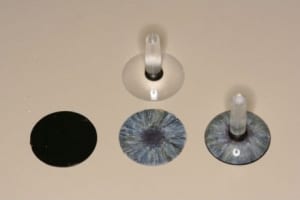
Fig.8 - This image shows the unpainted flat black disk (left). The colors are painted on the black disk in layers simulating the client’s iris color. A clear acrylic pupil button (middle) is then bonded to the painted disk. The finished iris button (right) produces a very life-like appearance. This method of iris fabrication has proven to maintain the original colors of the ocular prosthesis for many years.
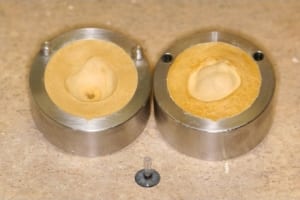
Fig.9 - This image shows the stone mold and corneal pupil button for the new prosthesis.
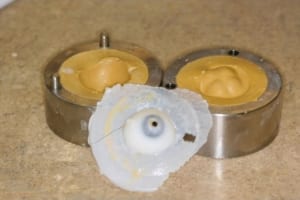
Fig.10 - The finished pupil button is then cast with white acrylic in the stone mold. The initial prosthesis is thoroughly cured under heat and pressure in a curing unit using specific ASO guidelines for polymerization.
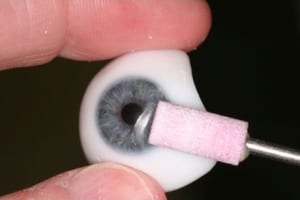
Fig.11 - The polymerized prosthesis is then removed from the stone mold. The iris color is slowly exposed using a fine stone sanding burr until the proper diameter is achieved.
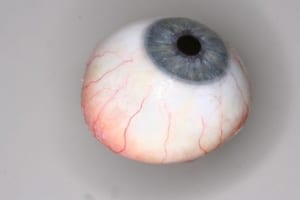
Fig.12 - Painting the sclera or white of the eye is achieved by matching the client’s companion eye. Oil pigments and acrylic syrup are used. Red silk thread is applied to the prosthesis to simulate veins. This veining technique gives a very life-like appearance to the prosthesis.
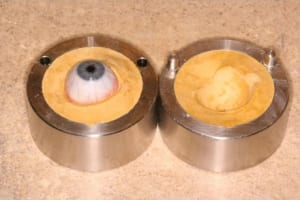
Fig.13 - Upon completion of painting and veining the prosthesis is placed back into the stone mold.
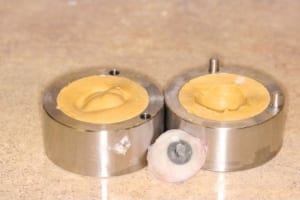
Fig.14 - A layer of clear acrylic is pressed over the front of the prosthesis and polymerized in the curing unit.
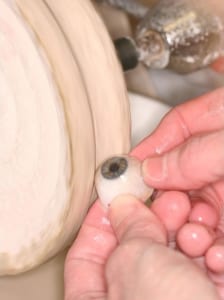
Fig.15 - The prosthesis is then polished using a wet pumice and buffing wheel to smooth surfaces, remove scratches and round the edges.
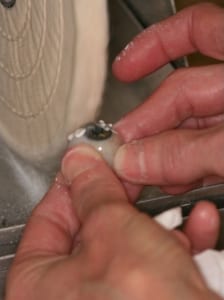
Fig.16 - A high shine is achieved by polishing the prosthesis using a hypo-allergenic acrylic polish on a flannel buffing wheel.
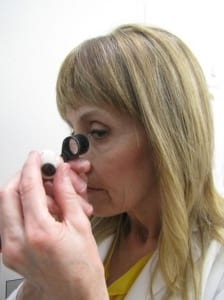
Fig.17 - Before delivery, the prosthesis is inspected under a 10x magnifying loupe ensuring all tool marks and scratches have been removed. This smooth shiny surface makes for a comfortable prosthesis.

Fig.18 - The prosthesis is then inserted. Final adjustments are made to achieve comfort, maximum movement , as well as a great cosmetic effect and finally our client’s approval.